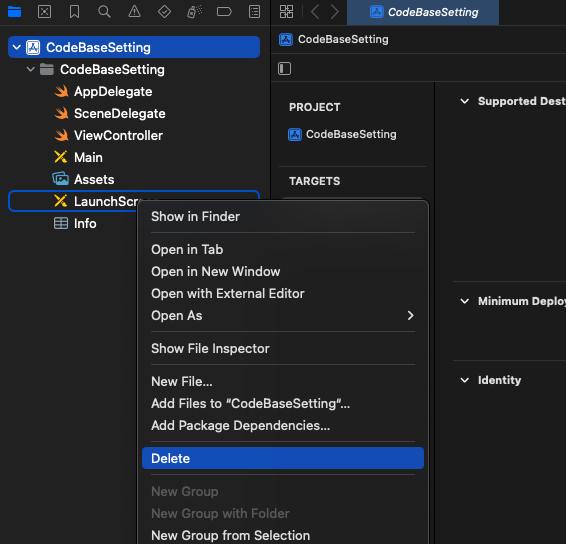
File Navigator - main.storyboard 파일 삭제
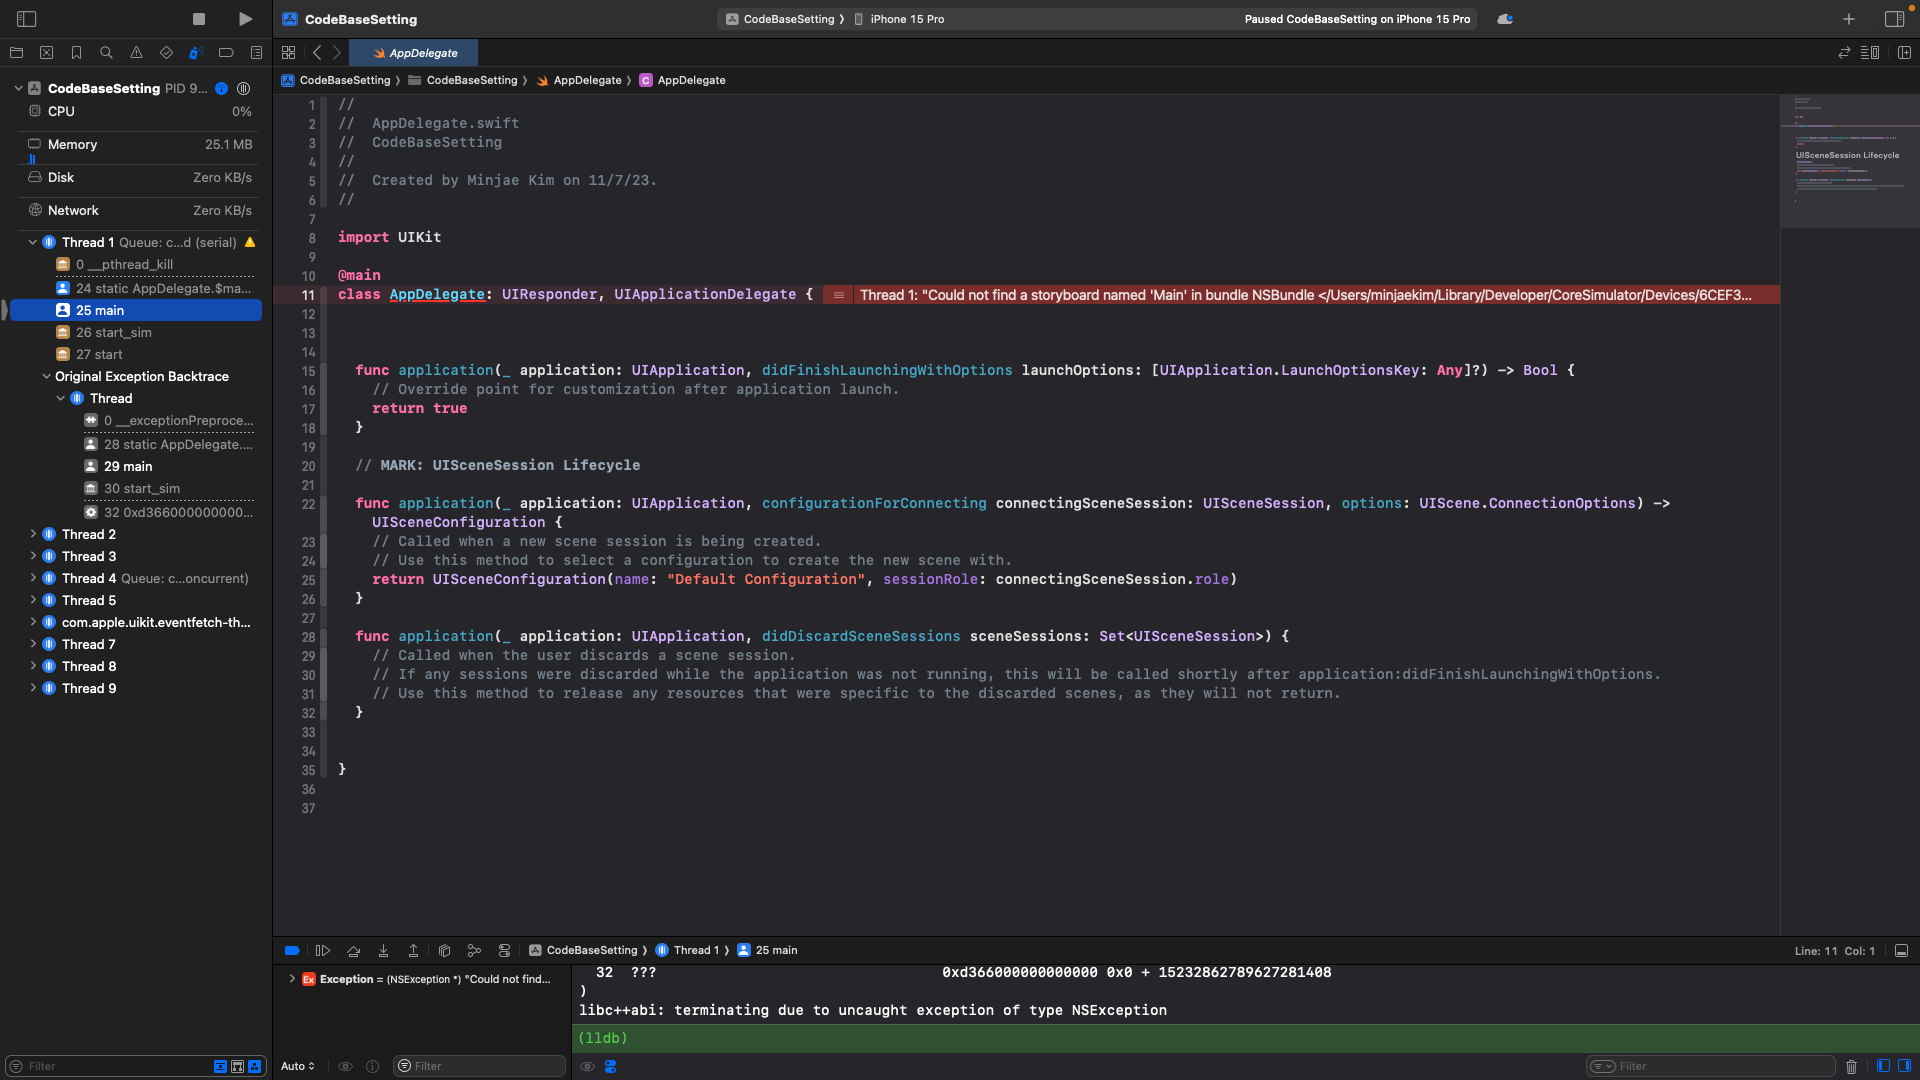
빌드를 하게 되면
Could not find a storyboard named 'Main' in bundle NSBundle 어쩌구
Runtime Error가 발생하게되는데
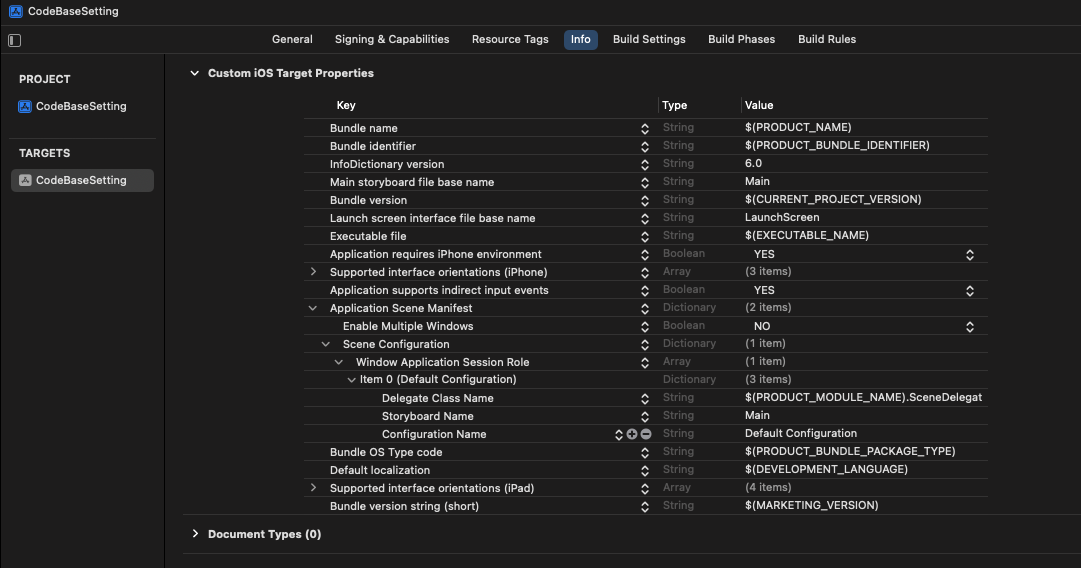
Info.plist - Configuration Name 필드 삭제
Info.plist 파일로 이동
- Application Scene Manifest
- Scene Configuration
- Window Application Session Role
- Item 0 (Default Configuration)
- Storyboard Name 삭제
- Item 0 (Default Configuration)
- Window Application Session Role
- Scene Configuration
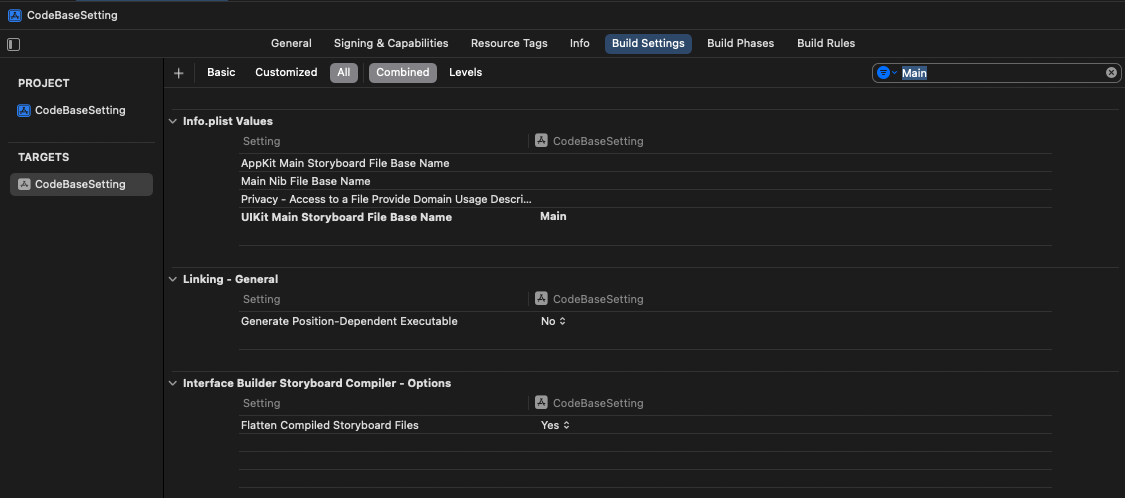
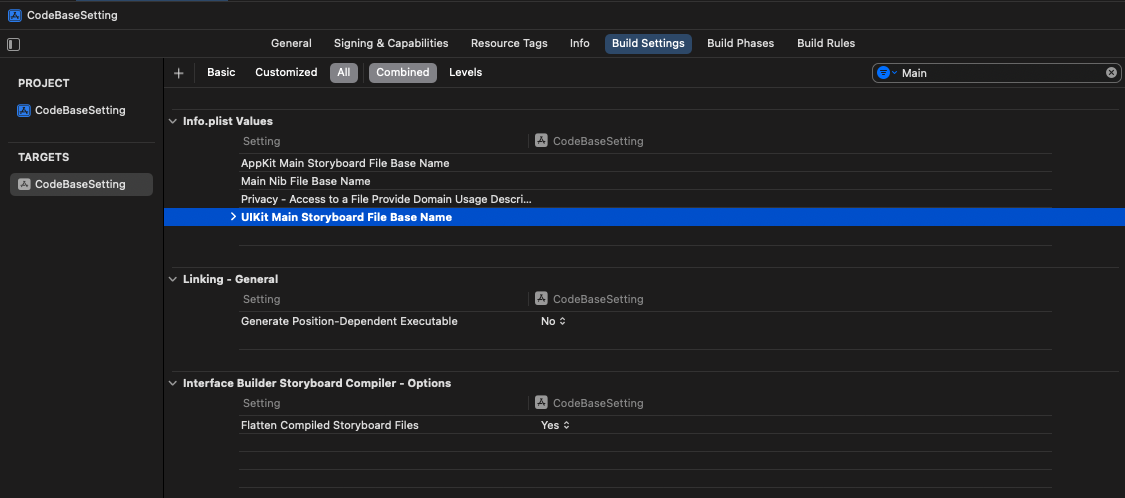
Build Settings로 이동
Build Settings에 있는 Main.storyboard에 대한 정보를 지워야 한다.
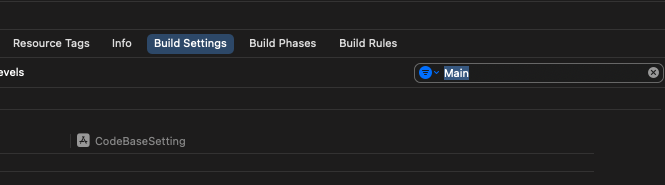
검색창에 Main을 검색해보면
UIKit Main Storyboard File Base Name 이 보이는데
해당 필드의 값을 지운다.
SceneDelegate File
SceneDelegate 는 스마트폰 화면에 뷰를 어떻게 보여줄지 관리해준다.
SceneDelegate의 func scene(_ scene, WillConnectTo, options)는 앱의 Lifecycle에서
가장 처음 호출되며 새로운 UIWindow를 생성하고
window의 rootViewController를 렌더링 해주는 역할을 한다
func scene(_ scene: UIScene, willConnectTo session: UISceneSession, options connectionOptions: UIScene.ConnectionOptions) {
		// Use this method to optionally configure and attach the UIWindow `window` to the provided UIWindowScene `scene`.
		// If using a storyboard, the `window` property will automatically be initialized and attached to the scene.
		// This delegate does not imply the connecting scene or session are new (see `application:configurationForConnectingSceneSession` instead).
		guard let _ = (scene as? UIWindowScene) else { return }
	}
이 부분을 일단 아래와 같이 수정해주고
func scene(_ scene: UIScene,
           willConnectTo session: UISceneSession,
           options connectionOptions: UIScene.ConnectionOptions) {

  guard let windowScene = (scene as? UIWindowScene) else { return }
  window = UIWindow(windowScene: windowScene)

  window?.rootViewController = ViewController()
  window?.makeKeyAndVisible()
}
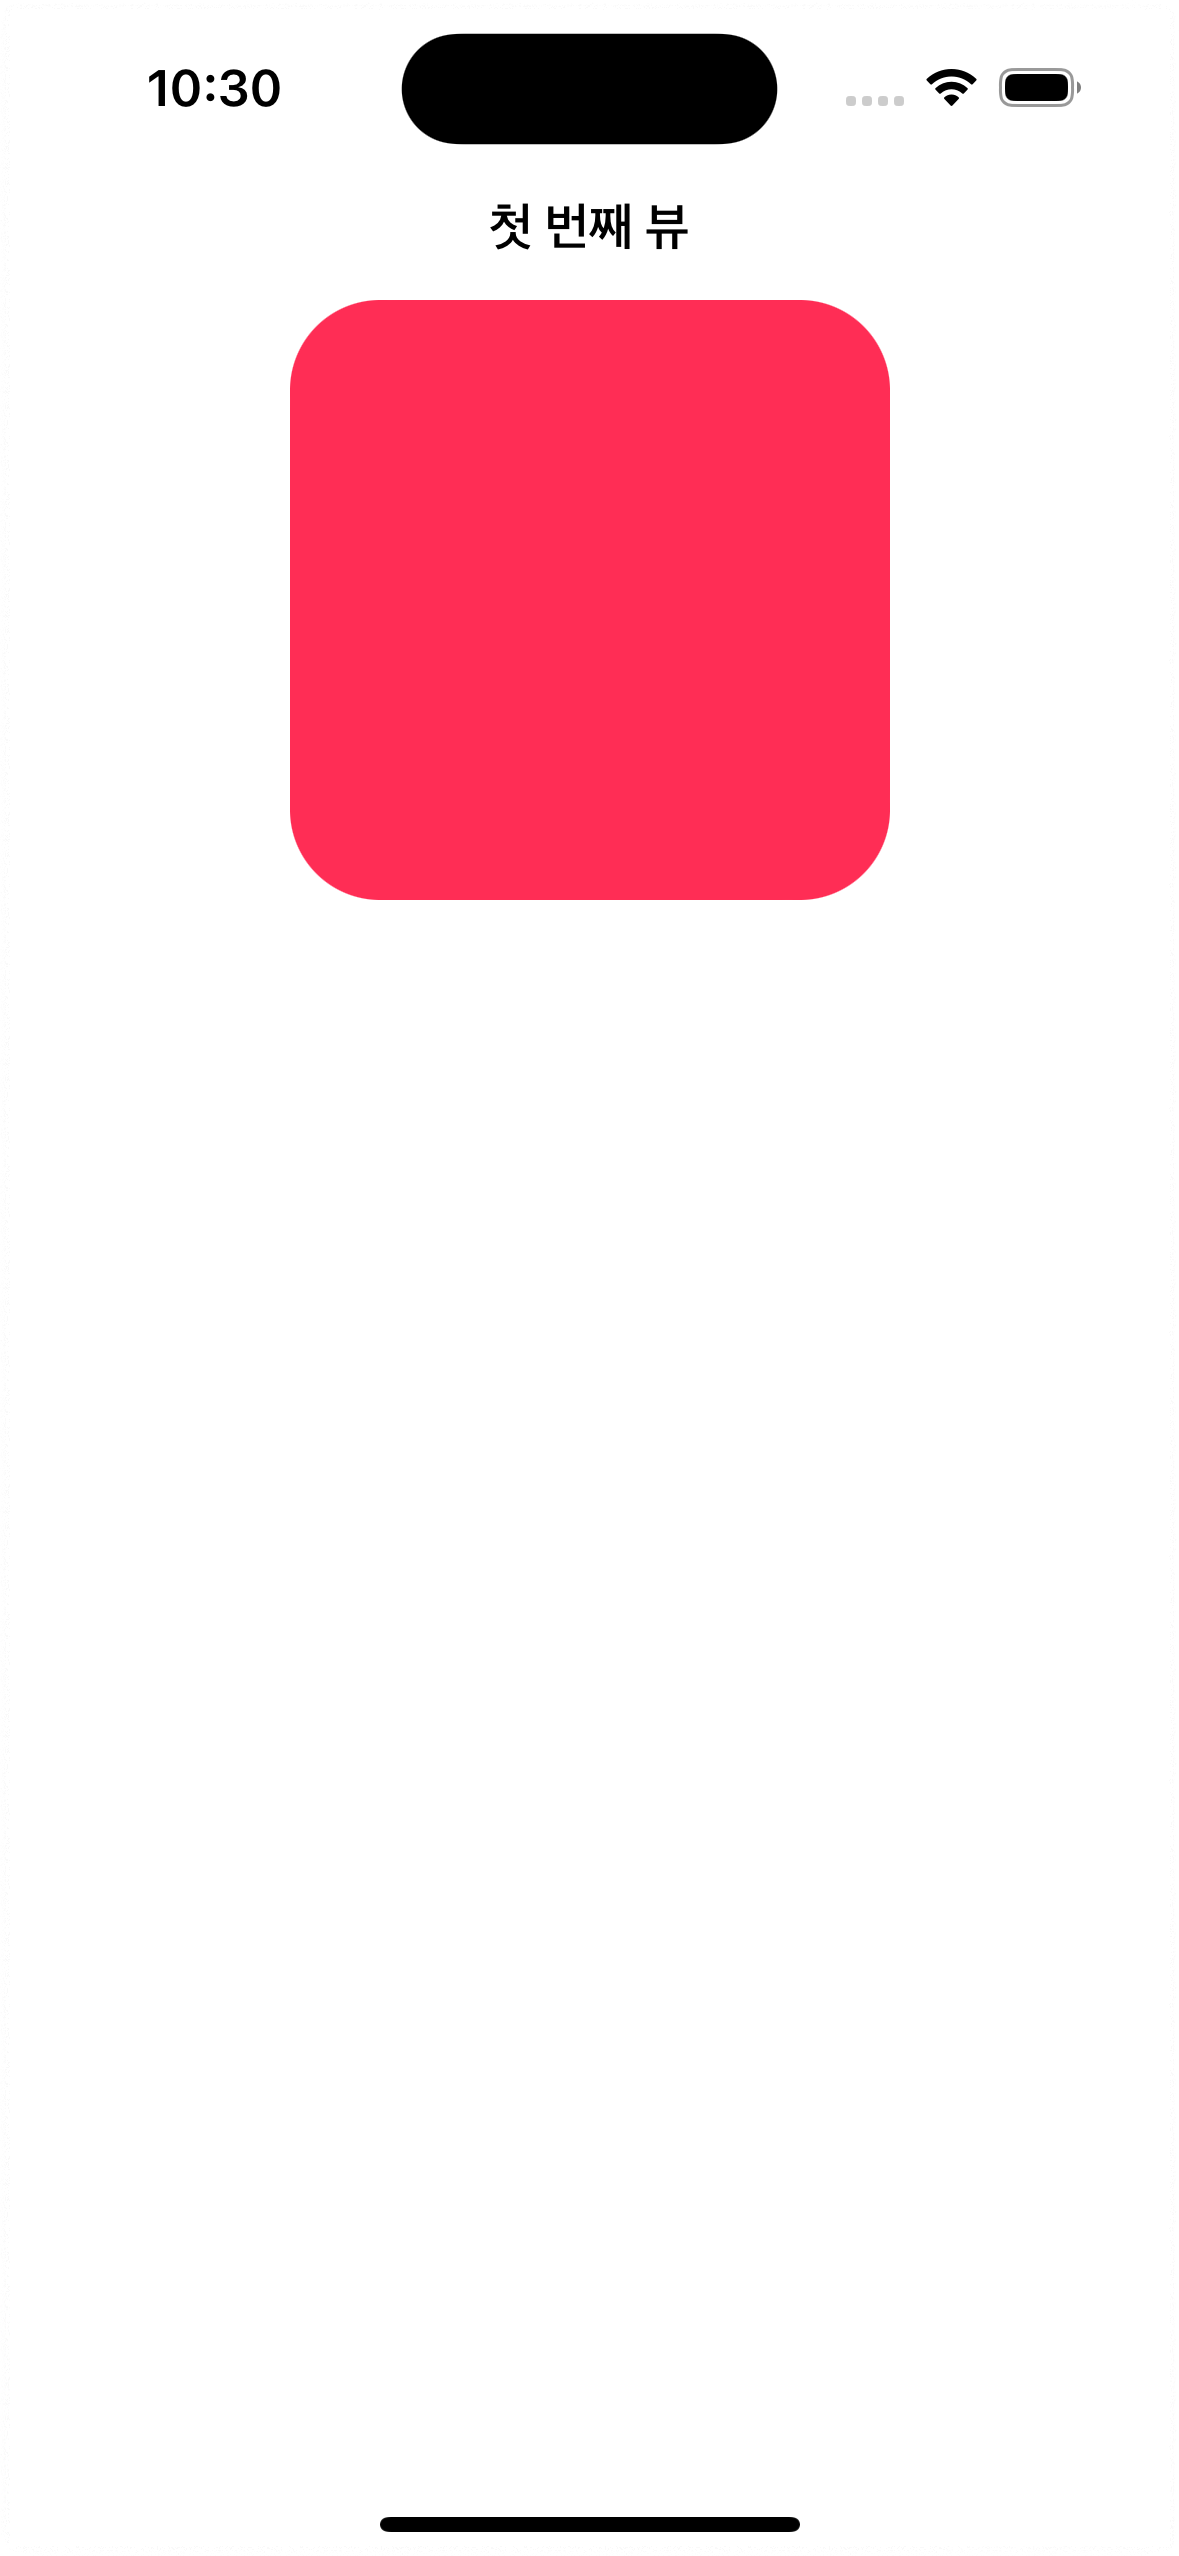
ViewController 파일도 아래와 같이 수정해보자.
import UIKit

class ViewController: UIViewController {

	override func viewDidLoad() {
		super.viewDidLoad()
		// 화면 배경색 설정
		self.view.backgroundColor = .systemBackground
		self.navigationItem.title = "첫 번째 뷰"

		let firstView: UIView = UIView()
		firstView.translatesAutoresizingMaskIntoConstraints = false
		firstView.backgroundColor = .systemPink
		self.view.addSubview(firstView)

		// x축, y축 위치
		firstView.centerXAnchor.constraint(equalTo: self.view.centerXAnchor).isActive = true
		firstView.topAnchor.constraint(equalTo: self.view.topAnchor, constant: 100).isActive = true

		// 뷰의 가로 세로 크기
		firstView.widthAnchor.constraint(equalToConstant: 200).isActive = true
		firstView.heightAnchor.constraint(equalToConstant: 200).isActive = true
		firstView.layer.cornerRadius = 30
	}
}
위의 코드를 빌드하게되면 아래의 뷰를
학인할 수 있다.
'iOS > UIKit' 카테고리의 다른 글
| UIKit에서 UICollectionView에 SkeletonView 간단하게 사용해보기 (3) | 2024.06.21 |
|---|---|
| UIKit - resignFirstResponder() & becomeFirstResponder() (4) | 2024.06.02 |
| UIKit - IBOutlet, IBAction 연결관계 에러 해결 방법 (0) | 2024.05.20 |
| UIKit - Default Button 이상현상 해결법 (1) | 2024.05.20 |
| UIKit & Interface Builder (0) | 2024.05.20 |


